
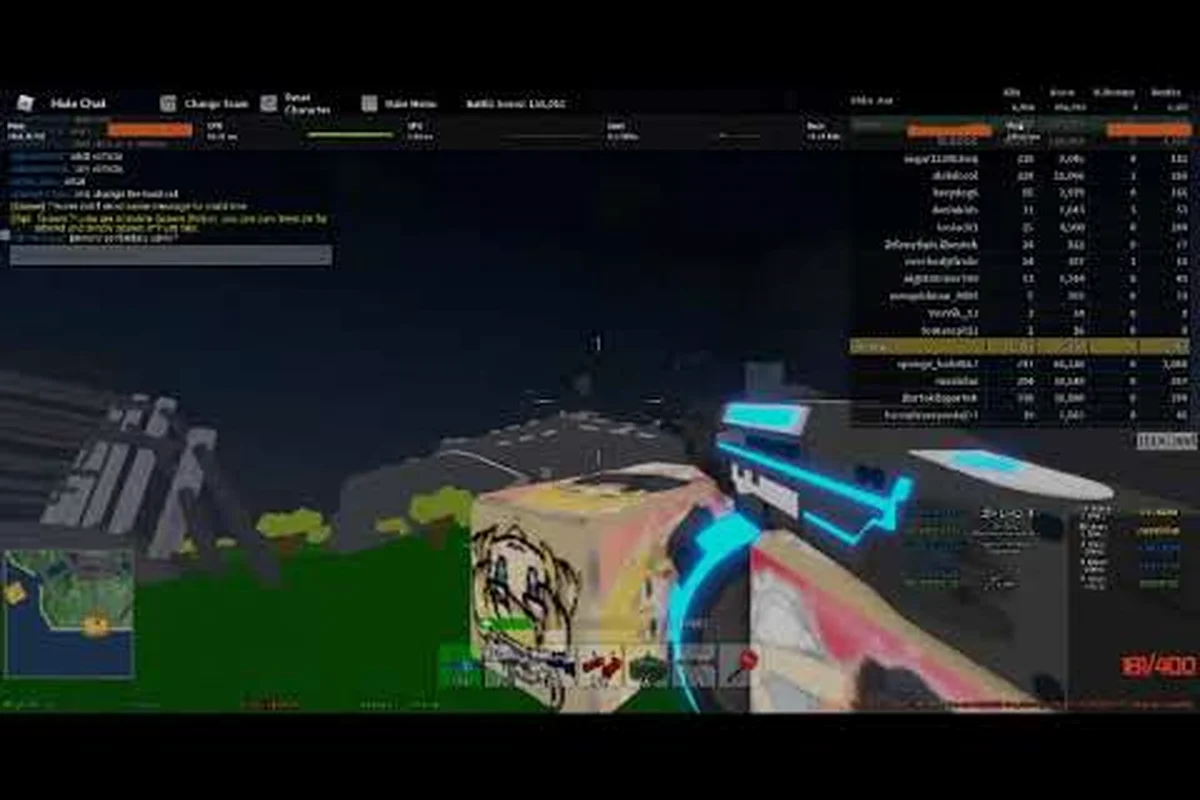
Picking the right armored vehicle in Base Wars separates a squad that steamrolls infantry from one that gets picked apart by jets and RPGs. This guide ranks every candidate for the best tank in Base Wars, breaks down the armor, cannon, and mobility stats that actually matter, and walks through the driving and gunning habits that keep a tank alive long enough to swing a base-defense fight.
Tank Tier List and Stat Comparison
The current Base Wars tank roster sits at four playable chassis, plus a fifth "floating" prototype that respawns under unusual conditions. Each chassis trades raw firepower for survivability or speed, so the strongest pick depends on the role your squad needs filled.
Main Battle Tanks Ranked
Below is the snapshot of how the four core tanks stack up against each other in the most common combat scenarios, based on community testing reported across Roblox Base Wars videos and player reports. The numbers reflect average performance at mid-range engagements around 60–80 studs, where front armor and cannon alpha matter more than raw DPS windows, and they line up with the Mammoth MBT, Striker L7, Vanguard A2, and Scorpion LT rows in the table that follows.
| Rank | Tank | Cannon Damage | Front Armor | Side Armor | Top Speed | Best Role |
|---|---|---|---|---|---|---|
| S | Mammoth MBT | 180 | 850 HP | 600 HP | 38 studs/s | Frontline push, objective hold |
| A | Striker L7 | 155 | 700 HP | 500 HP | 44 studs/s | Flanking, anti-jet pursuit |
| A | Vanguard A2 | 165 | 750 HP | 520 HP | 40 studs/s | Balanced assault |
| B | Scorpion LT | 120 | 500 HP | 380 HP | 52 studs/s | Scout, hit-and-run |
The Mammoth MBT tops the Base Wars best tank chart because its 850 HP front plate absorbs two full jet strafe passes before the driver needs to angle or retreat. Its 180-damage cannon one-shots most infantry loadouts and chunks enemy armor hard enough that a coordinated squad of two can strip a hostile tank inside ten seconds. The trade-off is speed: at 38 studs per second, the Mammoth cannot disengage from a bad fight, so positioning matters more than reaction time.
The Striker L7 is the smart pick when your team already has a Mammoth on point. Its lighter frame and 44 studs-per-second top speed let drivers swing wide around a base, catch infantry in the open, and reposition before a jet can lock on. The 155-damage cannon is still lethal against players, though it takes a half-second longer to finish off a fully-armored Mammoth compared to the Vanguard.
The Vanguard A2 is the balanced option. It loses a small amount of top speed to the Striker and a small amount of armor to the Mammoth, but it gives drivers a tank that handles almost any mid-range engagement without specialization. Squads running two Vanguards instead of a Mammoth and a Striker will trade peak damage for redundancy, which works well in long attrition matches.
The Scorpion LT is the outlier. It is technically a light tank, but it shows up in every "Base Wars best tank" conversation because of its 52 studs-per-second top speed. In a hands-off comparison it ranks B tier, but in the right hands a Scorpion flanks faster than players can call out, and its 120-damage cannon still punishes careless infantry. It folds to any jet, so it lives or dies on map awareness.
Floating Tank and Prototype Notes
A fifth chassis, the Hover Prototype, appears in some match rotations as a respawn pickup. Community footage such as The Technician's Floating Tank clip shows it drifting across gaps that wheeled tanks cannot cross, which makes it a fun choice for water-heavy maps. Its cannon is closer to the Striker's 155 damage, but its armor pool is the lowest of any tank in the game, so treat it as a mobility toy rather than a serious duelist.
How to Drive a Tank Without Wasting It
Even the strongest Base Wars best tank dies in under a minute if the driver treats it like a fast car. Tank combat rewards slow inputs, careful angles, and constant awareness of the minimap — for example, the Rhino's frontal armor soaks roughly 3,000 damage before plating cracks, but a sideways exposure to a rocket pod can chew through that same flank in two salvos. Pair that armor profile with a baseline 18 km/h top speed and a 360-degree turret traverse of about 4 seconds, and the math is clear: keep the nose pointed at the threat, use buildings as gun shields, and rotate the hull only when your crosshair is already on target.
Controls and Movement Basics
The default tank control scheme uses WASD to steer the hull and the mouse to aim the turret independently. Shift engages the handbrake for sharp pivot turns, and Space fires the main cannon. Left Ctrl switches the cannon to HE shells, which deal splash damage to grouped infantry but reduced direct damage to armor.
Drivers should keep the camera in third-person while moving and only switch to first-person for fine aim. Third-person lets the driver see ledges, jet shadows, and teammates who might block a turret rotation. First-person is too narrow for the situational awareness that tank combat demands.
When learning how to drive a tank, the single most important habit is aiming the hull, not the turret, when crossing open ground. A tank that drives sideways while aiming forward exposes its weaker side armor, and a single rocket from an anti-air infantry kit will strip 200 HP. Face the threat whenever possible, even if it means taking a longer route.
Cannon Recoil and Lead Calculation
The Mammoth MBT and Vanguard A2 cannons both kick back hard enough to push the hull a few studs. Fire in short bursts and let the crosshair settle between shots. Players used to infantry weapons tend to spam the cannon, which throws off aim more than it speeds up kills.
Against moving infantry, lead the target by roughly one body width at 30 studs. Against enemy tanks, aim for the turret ring or the lower front plate, which are the softest hitboxes. A well-placed shot on a turret ring deals bonus damage to the internal module, and a shot on the lower plate can detonate the engine on the Mammoth and Striker chassis.
Positioning and Angles
A tank should never sit still in the open. The Hull-Down position — peeking only the turret over a ridge — is the safest way to duel, because the enemy can only hit the cupola instead of the full front plate. On flat maps, use buildings and capture points as hard cover. A tank that hides half its hull behind a wall is much harder to kill than one that rolls out and brawls.
| Situation | Recommended Angle | Why It Works |
|---|---|---|
| Holding a capture point | Hull-down behind a crate or rock | Reduces exposed hitbox to the turret cupola |
| Pushing an enemy base | 30-degree angle, driver hatch back | Deflects cannon rounds into side armor instead of the reinforced front plate |
| Retreating from a jet | Drive perpendicular to the jet, fire as it passes | Jet strafe runs lose accuracy at sharp crossing angles |
| Escorting infantry | Drive in a wide arc, turret facing threat | Protects friendly players while keeping the cannon active |
Tank vs Jet and Other Vehicle Matchups
Base Wars vehicle combat is built around the relationship between ground and air units, and the tank's job is to be the anchor that punishes anyone who gets careless. Knowing the Base Wars tank vs jet dynamic is the difference between a team that holds ground and a team that gets farmed from above.
Tank vs Jet Dynamics
A jet has the speed and altitude to choose every engagement. The tank's counter is burst damage during a strafe pass and forcing the jet into low-altitude turns. Drivers who panic and reverse in a straight line will eat every rocket; drivers who turn 90 degrees and keep rolling break the jet's targeting cone.
The Striker L7 is the strongest tank for anti-jet work because its 44-stud top speed lets it swing onto a jet's six o'clock when the pilot overshoots. The Mammoth MBT is the strongest defensive tank because two of them firing alternating volleys at a passing jet can force the pilot to disengage. The Scorpion LT is the worst jet counter and should retreat indoors when a hostile jet enters the airspace.
| Vehicle Matchup | Winning Tank | Why |
|---|---|---|
| Tank vs Jet | Striker L7 | Highest top speed for pursuit and evasion |
| Tank vs Helicopter | Mammoth MBT | Burst damage during hover windows |
| Tank vs Infantry | Vanguard A2 | Balanced armor and cannon, easy to aim |
| Tank vs Boat | Striker L7 | Mobility to chase and reposition on water maps |
| Tank vs Another Tank | Mammoth MBT | Highest raw damage and front armor |
Counter-Play From the Passenger Seat
Every tank seats a driver and a gunner, and the gunner controls the secondary weapon — usually a coaxial machine gun or a top-mounted anti-air chaingun. The gunner's job is to shred infantry that try to swarm the tank and to suppress jet pilots who are lining up a strafe.
Coordinating with a gunner is the single biggest jump in performance. Drivers who ignore their gunner lose fights that the same tank would win with a coordinated crew. A good rule of thumb is to assign roles before the match starts: the driver watches the ground, the gunner watches the sky.
Vehicle Weapons and Loadout Choices
Tank main cannons are not the only vehicle weapons in Base Wars. Drivers and gunners can pick from secondary hardpoints that change how a tank performs against specific targets. Understanding the Base Wars vehicle weapons roster is what turns a generic tank into a specialized one.
Secondary Weapon Hardpoints
| Hardpoint | Weapon | Best Target | Trade-Off |
|---|---|---|---|
| Coaxial MG | M134 Chaingun | Infantry | Low damage vs armor, overheats fast |
| Top Turret | AA Chaingun | Jets, helicopters | Nearly useless at ground targets |
| Hull Pintle | HMG .50 cal | Light vehicles, infantry | Slow traverse, exposed gunner |
| Smoke Launcher | Smoke Screen x3 | Retreat, reposition | No damage, defensive only |
| Mine Dropper | AP Mines x5 | Pursuing tanks, infantry chokepoints | Requires planning, easy to miss |
The M134 Coaxial is the default choice and works against most targets, but the AA Chaingun hardpoint is mandatory on maps with active jet play. A Mammoth equipped with AA and a coordinated jet pilot on the same team can lock down a whole flank of the airspace.
Ammunition Switching
Smart tank drivers in Base Wars treat the AP, HE, and AT shell swap as their primary damage-tuning tool, not a cosmetic option, because each round trades penetration for splash or vice versa against a specific target profile. A typical engagement window against an enemy Mammoth lasts only 4–6 seconds, so the driver who already has AT loaded will land that 30% armor-bypassing hit on the first shot instead of wasting the opening salvo on AP. The shell hotkey sits on the driver's crosshair, and cycling it during the approach run — rather than mid-fight when the turret is exposed — is the habit that closes out tank vs tank duels before reinforcements arrive.
-
AP (Armor-Piercing): default shell, full damage to vehicles, reduced splash to infantry. Use against enemy tanks and helicopters.
-
HE (High-Explosive): lower direct damage, large blast radius, kills grouped infantry. Use against squads and capture-point defenders.
-
AT (Anti-Tank): unlockable shell, ignores 30% of the target's front armor. Save for high-value targets like the Mammoth or boss vehicles.
A driver who swaps to HE before pushing an infantry-held building will clear the room twice as fast as one who spams AP and hopes for splash. A driver who pops AT the moment a Mammoth peeks a corner will end the duel before the enemy can angle.
Crew Perks and Vehicle Mods
Each tank chassis has two mod slots that can be filled with perks like Reinforced Tracks (reduces immobilization damage) or Auto-Loader (cuts reload time by 15%). Squads that coordinate their perks — for example, one tank with Reinforced Tracks as a brawler and one tank with Auto-Loader as a sniper — can specialize without losing team balance.
For pilots looking to coordinate from the air, the Base Wars anti-air guide covers how jets, helicopters, and AA hardpoints interact on the same maps these tanks roll across, including lock-on ranges, splash damage radii against light armor, and the specific sightlines where an Anti-Air platform can suppress a circling jet before it lines up a rocket pass on your brawler — critical intel when deciding whether to spec Reinforced Tracks for survivability or save that mod slot for a perk that counters aerial spotting.
How to Fly a Jet and Win a Dogfight
Air combat is the other half of Base Wars vehicle combat, and pilots who learn how to fly a jet will either become the biggest threat on the field or the easiest kill. The trick is energy management: a jet that flies high and fast is hard to hit, while a jet that stalls is a free rocket for any gunner.
Pre-Flight and Takeoff
Pilots spawn at the runway with a full fuel bar and three air-to-air rockets. Hold W during the takeoff roll to build speed, then pull up gently. A sharp pull at low speed stalls the jet and drops it onto the runway, so the first lesson of learning how to fly a jet is patience on the takeoff.
Once airborne, climb to roughly 300 studs and trim the throttle. The optimal cruising altitude keeps the jet above most AA range while staying inside the map boundary. Drop below 200 studs only when committing to a strafe run, and climb back out as soon as the run ends.
Base Wars Jet Dogfight Tactics
Base Wars jet dogfight play usually boils down to three patterns, and a good pilot mixes all three in a single sortie. The boom-and-zoom profile is safest against entrenched flak turrets, but a turn fight only opens up once the opposing jet pilot chases below 300 studs and bleeds below 50% throttle — at that point a sustained 2-circle turn eats their lift vector and lets you snap a short-range burst. A well-timed low strafe through clustered vehicles can swing a losing ticket in one pass, provided you keep the wings level at 50 studs and pull up before the rocket trail clips the ground.
| Pattern | When to Use | How to Execute |
|---|---|---|
| Boom and Zoom | Enemy has strong AA | Climb high, dive on a target, fire, extend away |
| Turn Fight | Enemy pilot is inexperienced | Bleed their energy with sustained turns, then fire when they stall |
| Low Strafe | Ground targets are clustered | Drop to 50 studs, fire rockets into a group, pull up before the ground |
A Base Wars jet dogfight between two competent pilots usually ends when one of them makes a mistake in energy management. The pilot who keeps the throttle above 70% and the nose up wins, because the pilot who chases down into a turn loses airspeed and becomes a target.
Air-to-Ground Rockets
Pilots carry three air-to-ground rockets by default. These deal massive damage to vehicles and clustered infantry, but they have a long reload. A single rocket can strip 300 HP from a Mammoth's front plate, which means a coordinated two-jet pass can take a tank from full health to one cannon shot away from destruction.
For tank drivers who want to learn what pilots are trying to do to them, the Base Wars ship combat breakdown covers similar energy-vs-position dynamics in water maps, and the mechanics translate almost one-to-one to air play.
Field Strategy: When to Spawn a Tank
Knowing which tank to spawn is half the decision. The other half is knowing when to spawn it. Base Wars best tank discussions often skip this part, but timing is what turns a vehicle from a resource sink into a momentum swing.
Spawn Triggers
-
After your team loses two infantry pushes — the spawn timer is shorter than a full respawn wave, and a fresh tank breaks the enemy's defensive rhythm.
-
When the enemy spawns a jet — bring a Striker L7 or a tank with AA hardpoint to force the pilot to play defensive.
-
Mid-capture of a vehicle-heavy objective — tanks anchor captures better than infantry, because infantry inside the capture ring can be flushed by grenades, while a tank inside the ring holds it.
When Not to Spawn a Tank
A tank is a 60+ second commitment. Spawning one when the enemy team has four RPG-equipped infantry on a tight map is a recipe for losing the vehicle in under a minute. Likewise, spawning a tank on a small indoor map wastes most of its range advantage. Check the minimap, count the hostiles, and only commit when the team can support the push.
Squad leaders who want a deeper rundown of how vehicles fit into the wider match flow can cross-check against the Base Wars beginner guide, which covers spawn economy and respawn timers alongside ground-level movement.
Selecting a Tank That Matches Your Squad
The Base Wars best tank pick for any given match is the one that fills the gap your squad already has. A team of three Striker L7s will lose to a team with one Mammoth and two coordinated infantry. A team with one Mammoth and no flankers will get rolled by a competent Striker driver. Build a roster, not a stack.
| Squad Composition | Recommended Tank 1 | Recommended Tank 2 | Tank 3 (Optional) |
|---|---|---|---|
| Aggressive Push | Mammoth MBT | Striker L7 | Scorpion LT |
| Defensive Hold | Mammoth MBT | Mammoth MBT | Vanguard A2 |
| Air Denial | Striker L7 | Vanguard A2 (AA mod) | — |
| Scout Harass | Scorpion LT | Striker L7 | — |
| Anti-Infantry | Vanguard A2 | Vanguard A2 | Mammoth MBT |
Defensive holds want double Mammoth because the armor pool soaks up sustained fire from enemy jets and rocket squads. Aggressive pushes want the Mammoth-Striker-Scorpion trifecta because the Mammoth draws fire, the Striker flanks, and the Scorpion picks off stragglers. Air denial builds skip the heavy tank entirely because two medium tanks with AA hardpoints can keep a jet pilot honest for the whole match.
For an at-a-glance comparison of the tank chassis against the wider vehicle roster, the Base Wars grenade launcher tier list ranks the anti-vehicle tools infantry can bring to a tank fight, which is useful for predicting what threats a tank driver will face.
Frequently Asked Questions
What is the best tank in Base Wars for solo queue?
The Mammoth MBT is the strongest solo pick because it can absorb damage long enough for one player to make positioning mistakes and still survive. Pair it with the AA Chaingun top hardpoint so you can also fend off jet strafes without a gunner, and switch to HE shells when pushing infantry-held buildings.
How do I beat a jet as a tank driver?
Turn 90 degrees the moment you hear the jet's cannon and keep moving. A perpendicular crossing angle breaks the jet's rocket lock and forces the pilot into a wide turn for a second pass. Fire your coaxial MG or AA Chaingun during the first pass to force the pilot to climb, and never reverse in a straight line — that is the easiest rocket shot in the game.
Should I spawn a tank or stay on infantry?
Spawn a tank when the enemy has committed vehicles or when your team is stuck in a defensive loop that infantry cannot break. Stay on infantry when the enemy is running light vehicles only, because your rocket kit will strip a Striker or Scorpion faster than you can spawn a tank and roll to the fight. Also avoid tank spawns on small indoor maps where the chassis cannot maneuver.
How do I unlock the Mammoth MBT?
The Mammoth MBT is unlocked through the Armored Division progression track, which advances by dealing and receiving vehicle damage in Base Wars vehicle combat. Playing as a gunner in any tank contributes progress, so newer players can chip away at the unlock by crewing for higher-level drivers until the chassis is theirs.
What perks should I equip on a Striker L7?
Run Reinforced Tracks to survive immobilization grenades and Auto-Loader to fire 15% faster. The Striker's main weakness is its lighter armor, so the tracks perk keeps it mobile when infantry try to lock it down, and the auto-loader turns its 155-damage cannon into a much stronger dueling tool against Vanguards and other light targets.